

How To Learn To Be A Dom
Whenever yous create a React project, i of the showtime things you need to install along with the react parcel is the react-dom package. Take you ever wondered why you need it?
It may come up as a surprise, but we cannot render UI components with merely the react package. For rendering the UI to the browser, we accept to employ react-dom. In this guide, we will explore managing DOM components with ReactDOM past creating a sample app. As you lot follow along, nosotros will make some changes to our code to larn nigh the multiple methods available to you.
You can check out the code for the sample app on Github and the deployed site.
ReactDOM
ReactDOM renders components or JSX elements to the DOM. The ReactDOM object has only a scattering of methods; you've probably used the render() method, which is responsible for rendering the app in the browser.
The react-dom package serves equally the entry point to the DOM. We import it at the pinnacle of our project like this:
import ReactDOM from 'react-dom';
Before we go into the details of ReactDOM's methods, permit'southward starting time understand why nosotros need ReactDOM instead of just using the DOM.
Virtual DOM (VDOM) vs DOM
JavaScript and HTML can't communicate directly with one some other, so the DOM was developed to deal with this issue. When you lot open a webpage, the browser engine translates all of its content into a format that JavaScript tin understand — a DOM tree.
The structure of this tree is identical to that of the corresponding HTML document. If one element is nested inside another in the HTML code, this will be reflected in the DOM tree.
You tin see for yourself what the DOM looks like by opening the Elements tab in the developer tools panel of your browser. What y'all'll meet will expect very similar to HTML code, except that rather than looking at HTML tags, what you lot're actually seeing is elements of the DOM tree.
The DOM is the logical representation of a web page created past, and stored in, the user'due south browser. The browser takes the site's HTML and transforms it into a DOM, then paints the DOM to the user's screen, making the site visible to the user.
Permit'southward meet DOM in activeness. The diagram shows how the DOM sees the HTML:
<body> <nav> <ul> <li>Home</li> <li>Contact</li> </ul> </nav> <section class="cards"> <img src="" alt="" /> <div grade="mail-content"> <h1>Virtual DOM vs DOM</h4> </div> </section> </trunk>

The DOM has some issues, though. Imagine the user clicks on a button to remove an item. That node and all the other nodes depending on it will be removed from the DOM.
Whenever a browser detects a change to the DOM, it repaints the entire folio using the new version. But exercise we actually need to repaint the whole page? Comparing two DOMs to determine which parts have changed is very time consuming.
As a result, it'south actually faster for browsers to just repaint the entire folio whenever a user interacts with the site. That's where the Virtual DOM comes in.
A Virtual DOM is when React creates their ain representation of the DOM as a JavaScript object. Whenever a change is made to the DOM, the library instead makes a re-create of this JavaScript object, makes the alter to that copy, and compares the two JavaScript objects to see what has changed. It and so informs the browser of these changes and only those parts of the DOM are repainted.
Making changes to JavaScript objects and comparing them is far faster than trying to practice the same with DOMs. Since this copy of the DOM is stored in memory as a JavaScript object it's called a Virtual DOM.
The Virtual DOM prevents unnecessary repaints by but repainting updated elements and groups. The VDOM is a lightweight, fast, in-memory representation of the bodily DOM.
Fifty-fifty though React works with the VDOM whenever possible, it will still regularly interact with the actual DOM. The procedure by which React updates the bodily DOM to be consistent with the VDOM is called reconciliation.
ReactDOM.render()
At present that we accept a meliorate understanding of the DOM and VDOM, nosotros can start learning about our showtime method: ReactDOM.render. Usage of the return method is every bit follows:
ReactDOM.render(element, container[, callback]) ReactDOM.return(<h1>ReactDOM</h1>, document.getElementById("app")) The first argument is the element or component we want to render, and the 2d argument is the HTML element (the target node) to which we want to append information technology.
Generally, when we create our project with create-react-app, it gives u.s. a div with the id of a root within index.html, and we wrap our React awarding inside this root div.
So, when we use the ReactDOM.return() method, we laissez passer in our component for the showtime argument, and refer to id="root" with document.getElementById("root") as the second argument:
<!DOCTYPE html> <html lang="en"> <caput> <!-- ... --> </head> <body> <!-- ... --> <div id="root"></div> </body> </html>
// src/index.js import React from 'react'; import ReactDOM from 'react-dom'; // create App component const App = () => { render <div>Return Me!</div> } // render App component and show it on screen ReactDOM.return(<App />, document.getElementById('root')); Goodbye ReactDOM.render()
In June, the React team announced React 18, and with the new update, we will not be using ReactDOM.render() anymore. Instead, we will be using ReactDOM.createRoot.
The alpha version of React 18 is available, but it will take several months for the public beta. If y'all want to experiment with the React eighteen alpha version, install information technology like this:
npm install [e-mail protected] [e-mail protected]
With React xviii, nosotros volition use ReactDOM.createRoot to create a root, and so laissez passer the root to the return function. When you switch to createRoot, you lot'll get all of the new features of React 18 by default:
import ReactDOM from "react-dom"; import App from "App"; const container = document.getElementById("app"); const root = ReactDOM.createRoot(container); root.render(<App />); ReactDOM.createPortal()
Our second method on ReactDOM is createPortal.
Do you ever need to create an overlay, or modal? React has different functions to deal with modals, tooltips, or other features of that nature. One is the ReactDOM.createPortal() function.
To render a modal, or overlay, nosotros need to use the z-alphabetize property to manage the order in which elements appear on the screen. z-index allows the states to position elements in terms of depth, along the z-centrality.
However, every bit you lot know, we tin just return one div, with all the other elements nested inside our root div. With the help of the createPortal part, nosotros can render our modals outside of the primary component tree. The modal will be the child of the body chemical element. Let's see how.
In our index.html we volition add another div for the modal:
// index.html <body> <noscript>Yous need to enable JavaScript to run this app.</noscript> <div id="root"></div> <div id="modal"></div> </body>
The ReactDOM.createPortal() function takes two arguments: the first is JSX, or what we want to render on the screen, and the second argument is a reference to the element we desire to adhere to our modal:
// Modal.js import { createPortal } from 'react-dom'; const modalRoot = document.querySelector('#modal'); const Modal = ({ children }) => createPortal(children, modalRoot); consign default Modal; Now, to return our component, nosotros can pass whatever we want to show between our modal component's opening and closing tags. This will be rendered inside the modal component as children. I have rendered the modal inside App.js.
In our App.js file, nosotros have a push to open the modal. When the user interacts with the button, we are showing the modal along with a close button:
// App.js import React, { useCallback, useState } from 'react'; import Modal from '../Modal'; const App = () => { const [showModal, setShowModal] = useState(false); const openModal = useCallback(() => setShowModal(true), []); const closeModal = useCallback(() => setShowModal(fake), []); render ( <div className='App'> <button onClick={openModal} className='push button node'> Click To Run across Modal </button> {showModal ? ( <Modal> <div className='modal-container'> <div class='modal'> <h1>I'k a modal!</h1> <button onClick={closeModal} className='shut-button'></push> </div> </div> </Modal> ) : null} </div> ); }; export default App; 
ReactDOM.unmountComponentAtNode()
We use this method when nosotros need to remove a DOM node afterwards it'southward mounted, and clean up its consequence handlers and state.
We volition continue on with our lawmaking again, this time we will unmount our root div:
ReactDOM.unmountComponentAtNode(container)
For the container, we are passing in the root div, and so when the user clicks on the button, information technology will unmount the app.
If you try to unmount the modal id, you will see an mistake. This is because the modal is not mounted, so it will return false:
// App.js const App = () => { ReactDOM.unmountComponentAtNode(document.getElementById("root")); return ( <push onClick={handleUnmount} className='button'> Unmount App </button> ) } This code is enough to unmount the root.
ReactDOM.findDOMNode()
We know that nosotros can render our DOM elements with the render method. Nosotros can as well get access to the underlying DOM node with the help of findDOMNode method. According to the React documentation, this method is discouraged because information technology pierces the component abstraction.
Note:
findDOMNodemethod has been deprecated in StrictMode.
Generally, if yous need to refer to any DOM element, it's advised to use the useRef hook. In most cases, you can attach a ref to the DOM node and avoid using findDOMNode at all.
Some other key bespeak is the Node element that you want to access must be mounted, which means it must be in the DOM. If it's not mounted, findDOMNode returns nil. Once y'all get access to the mounted DOM node, you lot can utilise the familiar DOM API to audit the node.
findDOMNode takes one parameter, and information technology's the component:
ReactDOM.findDOMNode(component)
Nosotros will keep with the code that we used on the createPortal method. I created a new push button and added the text Detect The Modal Button and Change its Background Color, and added an onClick handler role. With this part, I accessed its className with the document.querySelector method and inverse its background color to black:
const App = () => { const handleFindDOMNode = () => { const node = certificate.querySelector('.node'); ReactDOM.findDOMNode(node).way.backgroundColor = 'black'; }; render ( <push onClick={handleFindDOMNode} className='button'> Discover The Modal Push button and Change its Background Color </button> ) } 
ReactDOM.hydrate() and Server-Side Rendering (SSR)
The hydrate method will help u.s.a. pre-render everything on the server side, so send the user the complete markup. It is used to add together content to a container that was rendered by the ReactDOMServer.
This may audio similar a gibberish right now, but the chief takeaway is that we tin render our React applications on the client or server side. Here's a quick overview of the main differences between Client-Side Rendering (CSR) and Server-Side Rendering (SSR).
Client-Side Rendering (CSR)
When we create and run our projection with create-react-app, it doesn't show the contents of the folio:
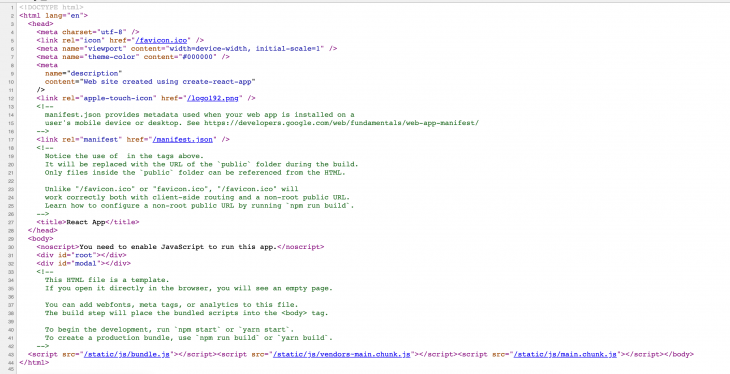
As y'all can see from the screenshot, nosotros take simply our divs and a reference to our JavaScript parcel, nothing else. So, this is really a blank page. This ways when we get-go load our page, the server makes a asking to the HTML, CSS, and JavaScript. After the initial render, the server checks our bundled JavaScript (or React lawmaking, in our case) and paints the UI. This arroyo has some pros and cons.
Pros:
- Quick
- Static deployment
- Supports Single Page Applications (SPA)
Cons:
- Renders a blank page at initial load
- Bundle size may exist large
- Non good for SEO
Server- Side Rendering (SSR)
With Server-Side Rendering, we don't return an empty page anymore. With this approach, the server creates static HTML files which the browser renders.
This is how SSR works: when the user requests a website, the server renders the static version of the app, allowing users to encounter the website is loaded. The website is not interactive yet, so when the user interacts with the app, the server downloads the JavaScript and executes it.
The site becomes responsive by replacing the static content with the dynamic content. ReactDOM.hydrate() function is really called on the load event of these scripts and hooks the functionality with the rendered markup.
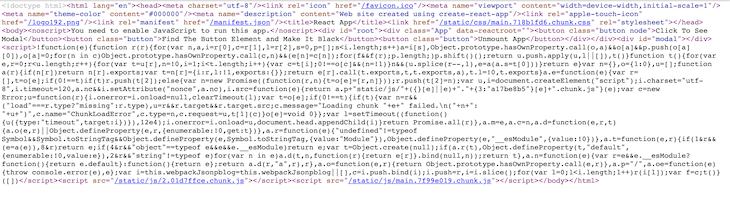
If you are curious, when we create our project with SSR, we tin see the HTML and JavaScript code rendered at initial load:
Pros:
- Better operation
- Corking for SEO to help us create easily indexable and crawlable websites
- Fast interactivity
- Speeds uploading time by running React on the server before serving the request to the user.
Cons:
- Creates lots server requests
- If you have lots of interactive elements on your site, it can slow down the rendering
Demo of ReactDOM.hydrate()
As you can imagine, for this to work, we demand to create a server. We volition exist creating the server with Express, merely start we demand to do some cleanup.
To run a Node.js server using hydrate, we demand to remove all references to the window and certificate, because we will render our markup in the server, not in the browser.
Permit's get to the Modal.js file and move the document.querySelector inside the modal component:
// Modal.js import { createPortal } from 'react-dom'; let modalRoot; const Modal = ({ children }) => { modalRoot = modalRoot ? modalRoot : certificate.querySelector('#modal'); render createPortal(children, modalRoot); }; export default Modal; Adjacent upwardly, we demand to change ReactDOM.render to ReactDOM.hydrate inside the src/index.js file:
ReactDOM.hydrate( <React.StrictMode> <App /> </React.StrictMode>, document.getElementById('root') ); Now, we can create our server. Create a new folder called server and create a file inside this folder named server.js. Install Limited with npm install express:
// server/server.js import limited from 'express'; import fs from 'fs'; import path from 'path'; import React from 'react'; import { renderToString } from 'react-dom/server'; import App from '../src/App'; const app = express(); app.apply('^/$', (req, res, next) => { fs.readFile(path.resolve('./build/alphabetize.html'), 'utf-eight', (err, data) => { if (err) { console.error(err); return res.status(500).send('Fault'); } return res.send( data.replace( '<div id="root"></div>', `<div id="root">${renderToString(<App />)}</div>` ) ); }); }); app.utilise(limited.static(path.resolve(__dirname, '..', 'build'))); app.listen(3000, () => { panel.log('Listening on port 3000'); }); Here nosotros have required Limited, the fs (file system) module, the path, React, ReactDOMServer.renderToString, and App from our src folder.
The ReactDOMServer.renderToString returns the static HTML version of our app.
Next, run the build command npm run build to create a build folder. Configure Boom-boom, and then install npm i @babel/preset-env @babel/preset-react @babel/register ignore styles. Finally, create a new file named server/index.js:
// server/index.js require('ignore-styles'); crave('@babel/register')({ ignore: [/(node_modules)/], presets: ['@babel/preset-env', '@babel/preset-react'], }); crave('./server'); Add a script for SSR in bundle.json: "ssr": "node server/index.js". Run the server with npm run ssr.
Remember, if yous brand changes in your app, first run npm run build, and then npm run ssr.
Changes to hydrate with React eighteen
In React 18, a new Suspense-based SSR architecture is introduced. The hydrate method will besides be replaced by hydrateRoot.
Conclusion
We have covered a lot about ReactDOM. To summarize, hither are the key takeaways nosotros learned throughout this postal service:
- React uses a Virtual DOM, which helps us prevent unnecessary DOM repaints, and updates only what has inverse in the UI
- We employ the
rendermethod to return our UI components to the browser, the most-often used ReactDOM method - We use the
createRootmethod instead of therendermethod with React 18 - We tin can create modals and tooltips with the
createPortalmethod - Nosotros can unmount a component with the
unmountComponentAtNodemethod - We tin get access to whatever DOM node with the
findDOMNodemethod, but the best way is to utiliserefinstead - We can use SSR in React with the help of the
hydratemethod, just be prepared for React xviii and Suspense-based SSR architecture - SSR helps us pre-render everything on the server side for better SEO optimization
Total visibility into product React apps
Debugging React applications can be difficult, especially when users feel issues that are difficult to reproduce. If you're interested in monitoring and tracking Redux state, automatically surfacing JavaScript errors, and tracking boring network requests and component load fourth dimension, try LogRocket. 

LogRocket is like a DVR for spider web and mobile apps, recording literally everything that happens on your React app. Instead of guessing why problems happen, you tin amass and report on what state your application was in when an outcome occurred. LogRocket also monitors your app's operation, reporting with metrics like client CPU load, customer memory usage, and more.
The LogRocket Redux middleware bundle adds an extra layer of visibility into your user sessions. LogRocket logs all actions and state from your Redux stores.
Modernize how you debug your React apps — beginning monitoring for gratis.

Source: https://blog.logrocket.com/managing-dom-components-reactdom/
Posted by: williamscomentse.blogspot.com
0 Response to "How To Learn To Be A Dom"
Post a Comment